
Add Your First Reptile to Scutely
This page walks you through adding your first animal. By the end you’ll have a profile in your collection that you can start logging care against.
Add an animal
- Go to the Library tab.
- Tap the + button in the top right.
- Choose Create One to fill out the full profile yourself.
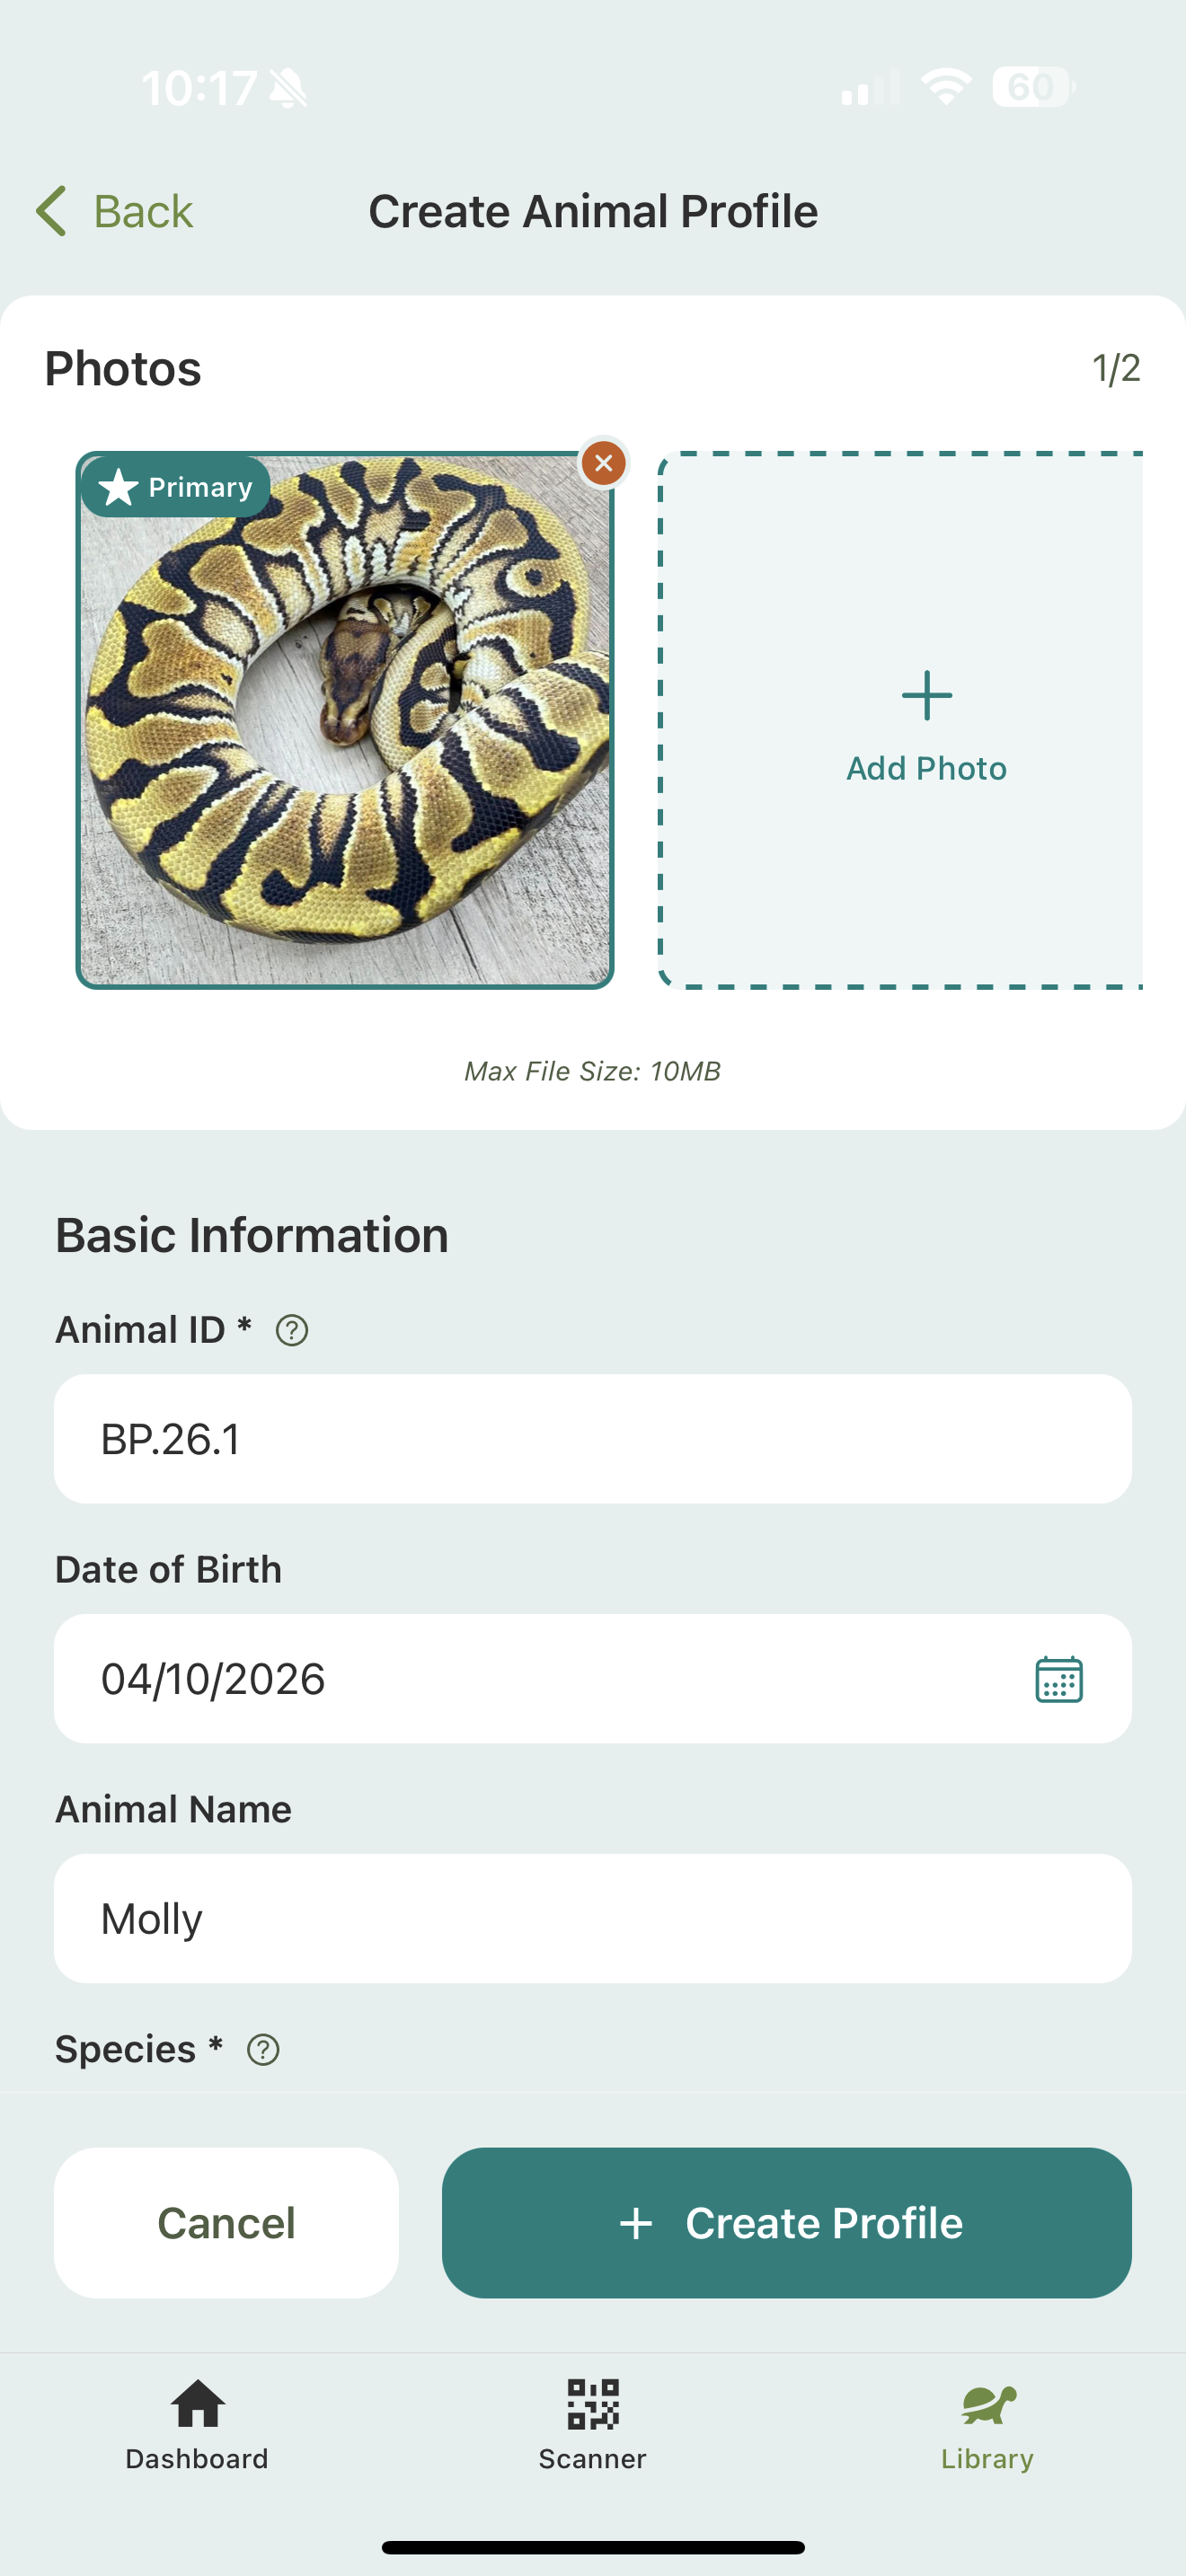
- Enter the basics under Basic Information:
- Animal ID — your identifier for the animal (e.g.
BP.26.1), plus an optional name and date of birth. - Species — search or browse; Scutely supports hundreds of species.
- Animal ID — your identifier for the animal (e.g.
- Add a photo if you have one. The first photo becomes the profile image (marked Primary).
- Tap Create Profile.
The animal now has a profile in your Library.
What’s on the form
The rest of the create form is optional — you can fill in as much or as little as you like now and add the rest later.
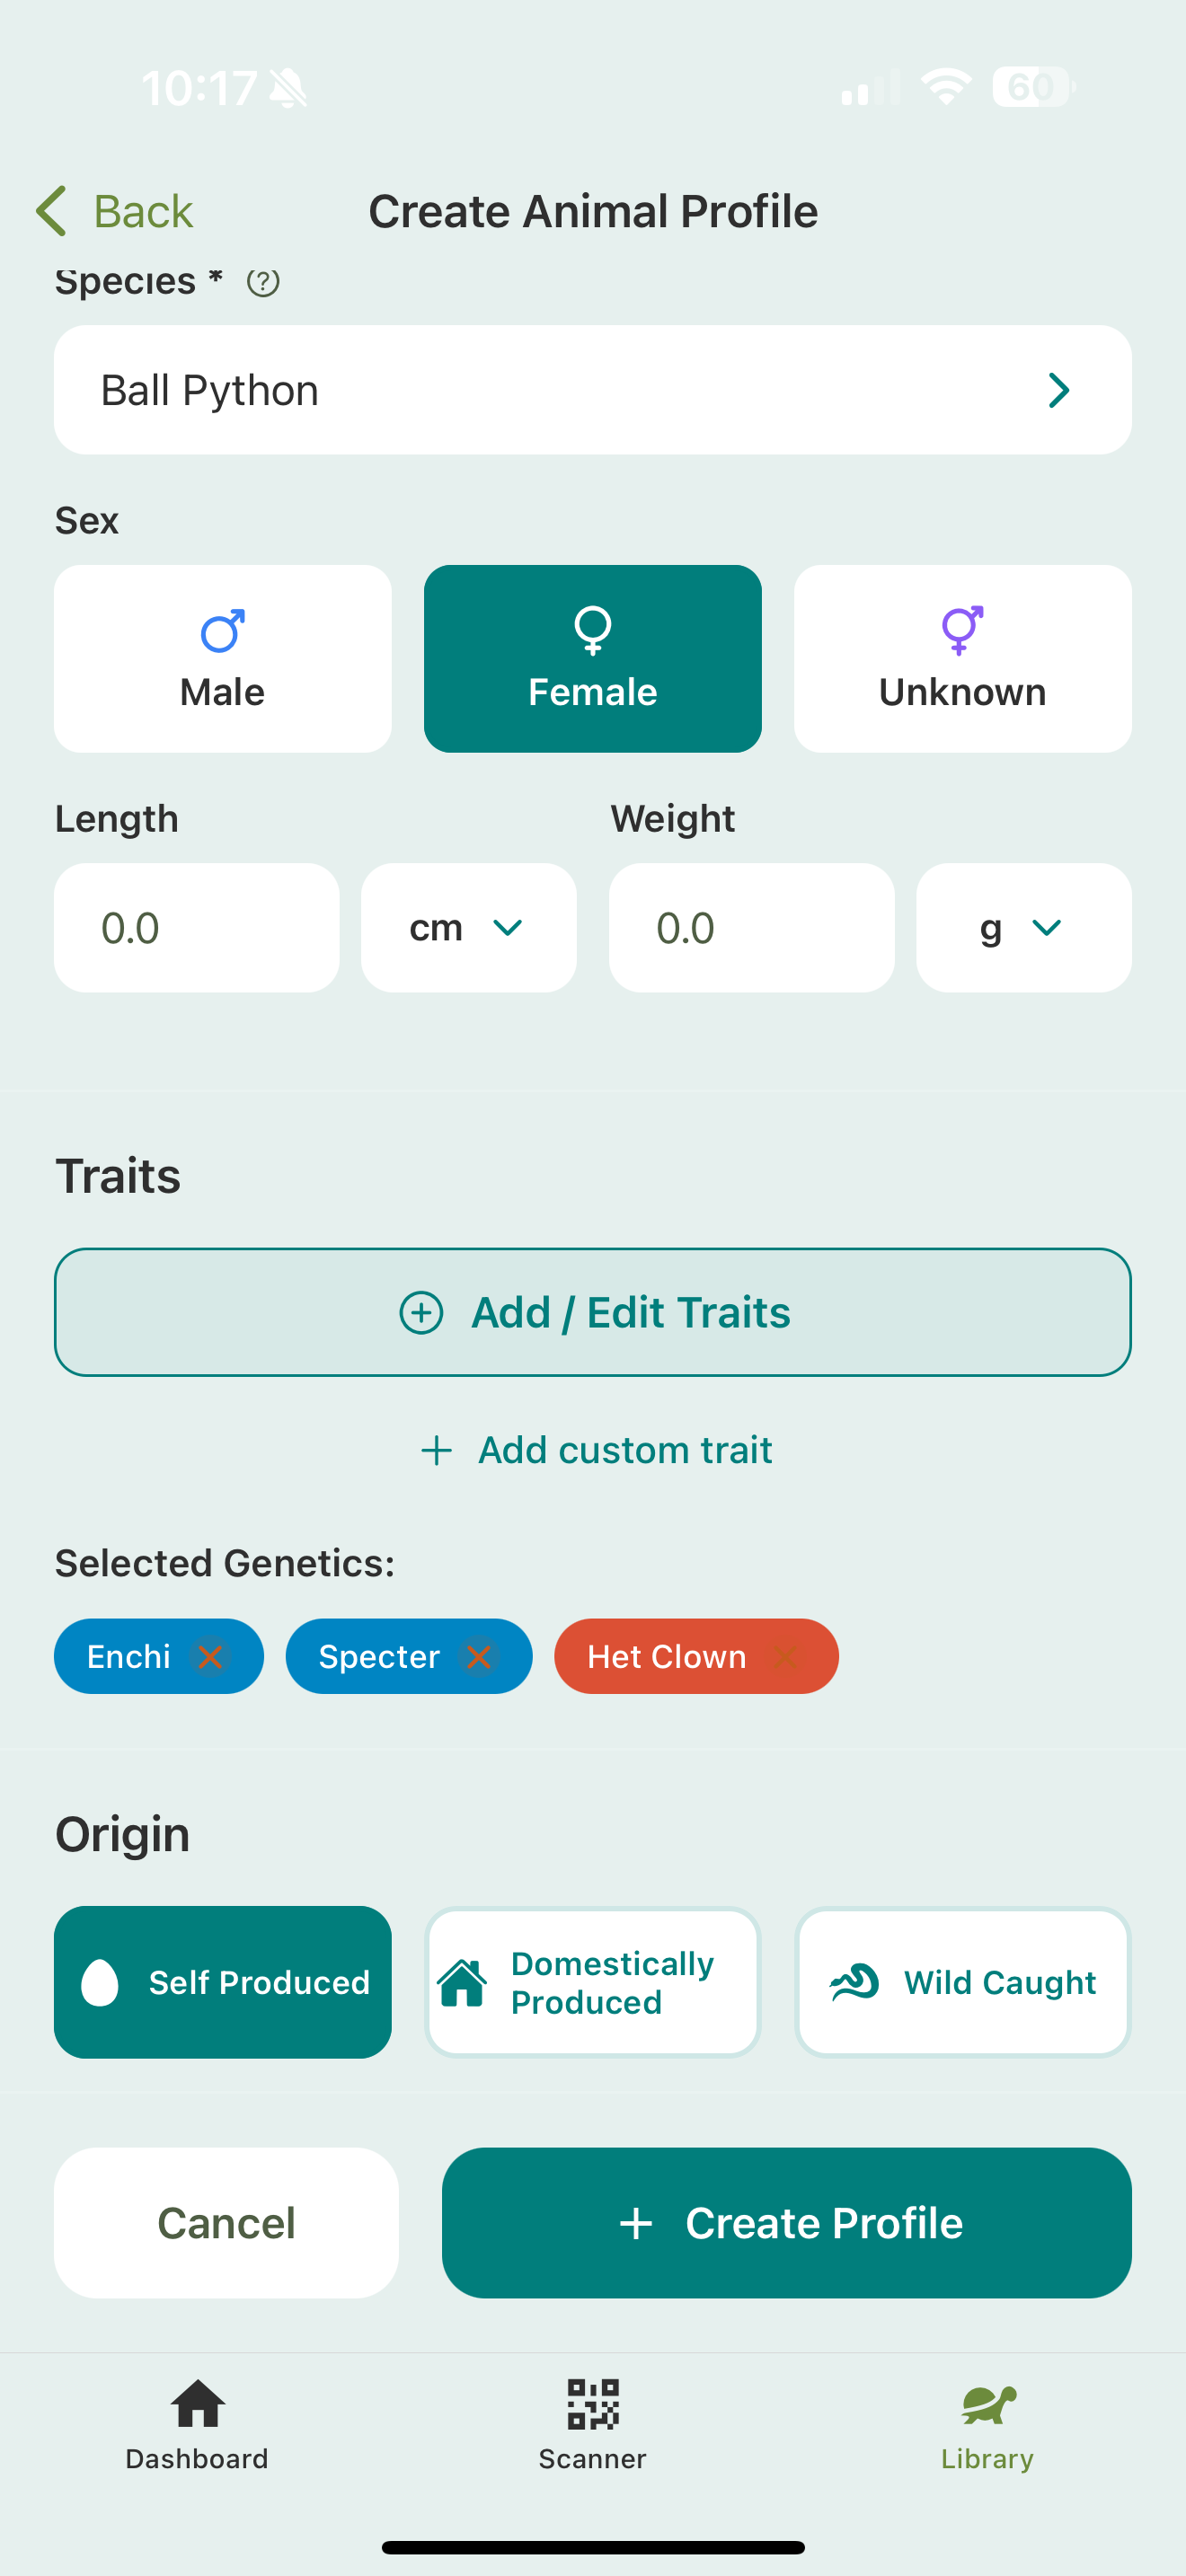
- Sex — male, female, or unknown.
- Length & weight — a starting measurement, which becomes the first point on the animal’s growth charts.
- Traits — tap Add / Edit Traits to pick morphs, or Add custom trait for your own. Selected genetics show as color-coded pills.
- Origin — Self Produced, Domestically Produced, or Wild Caught.
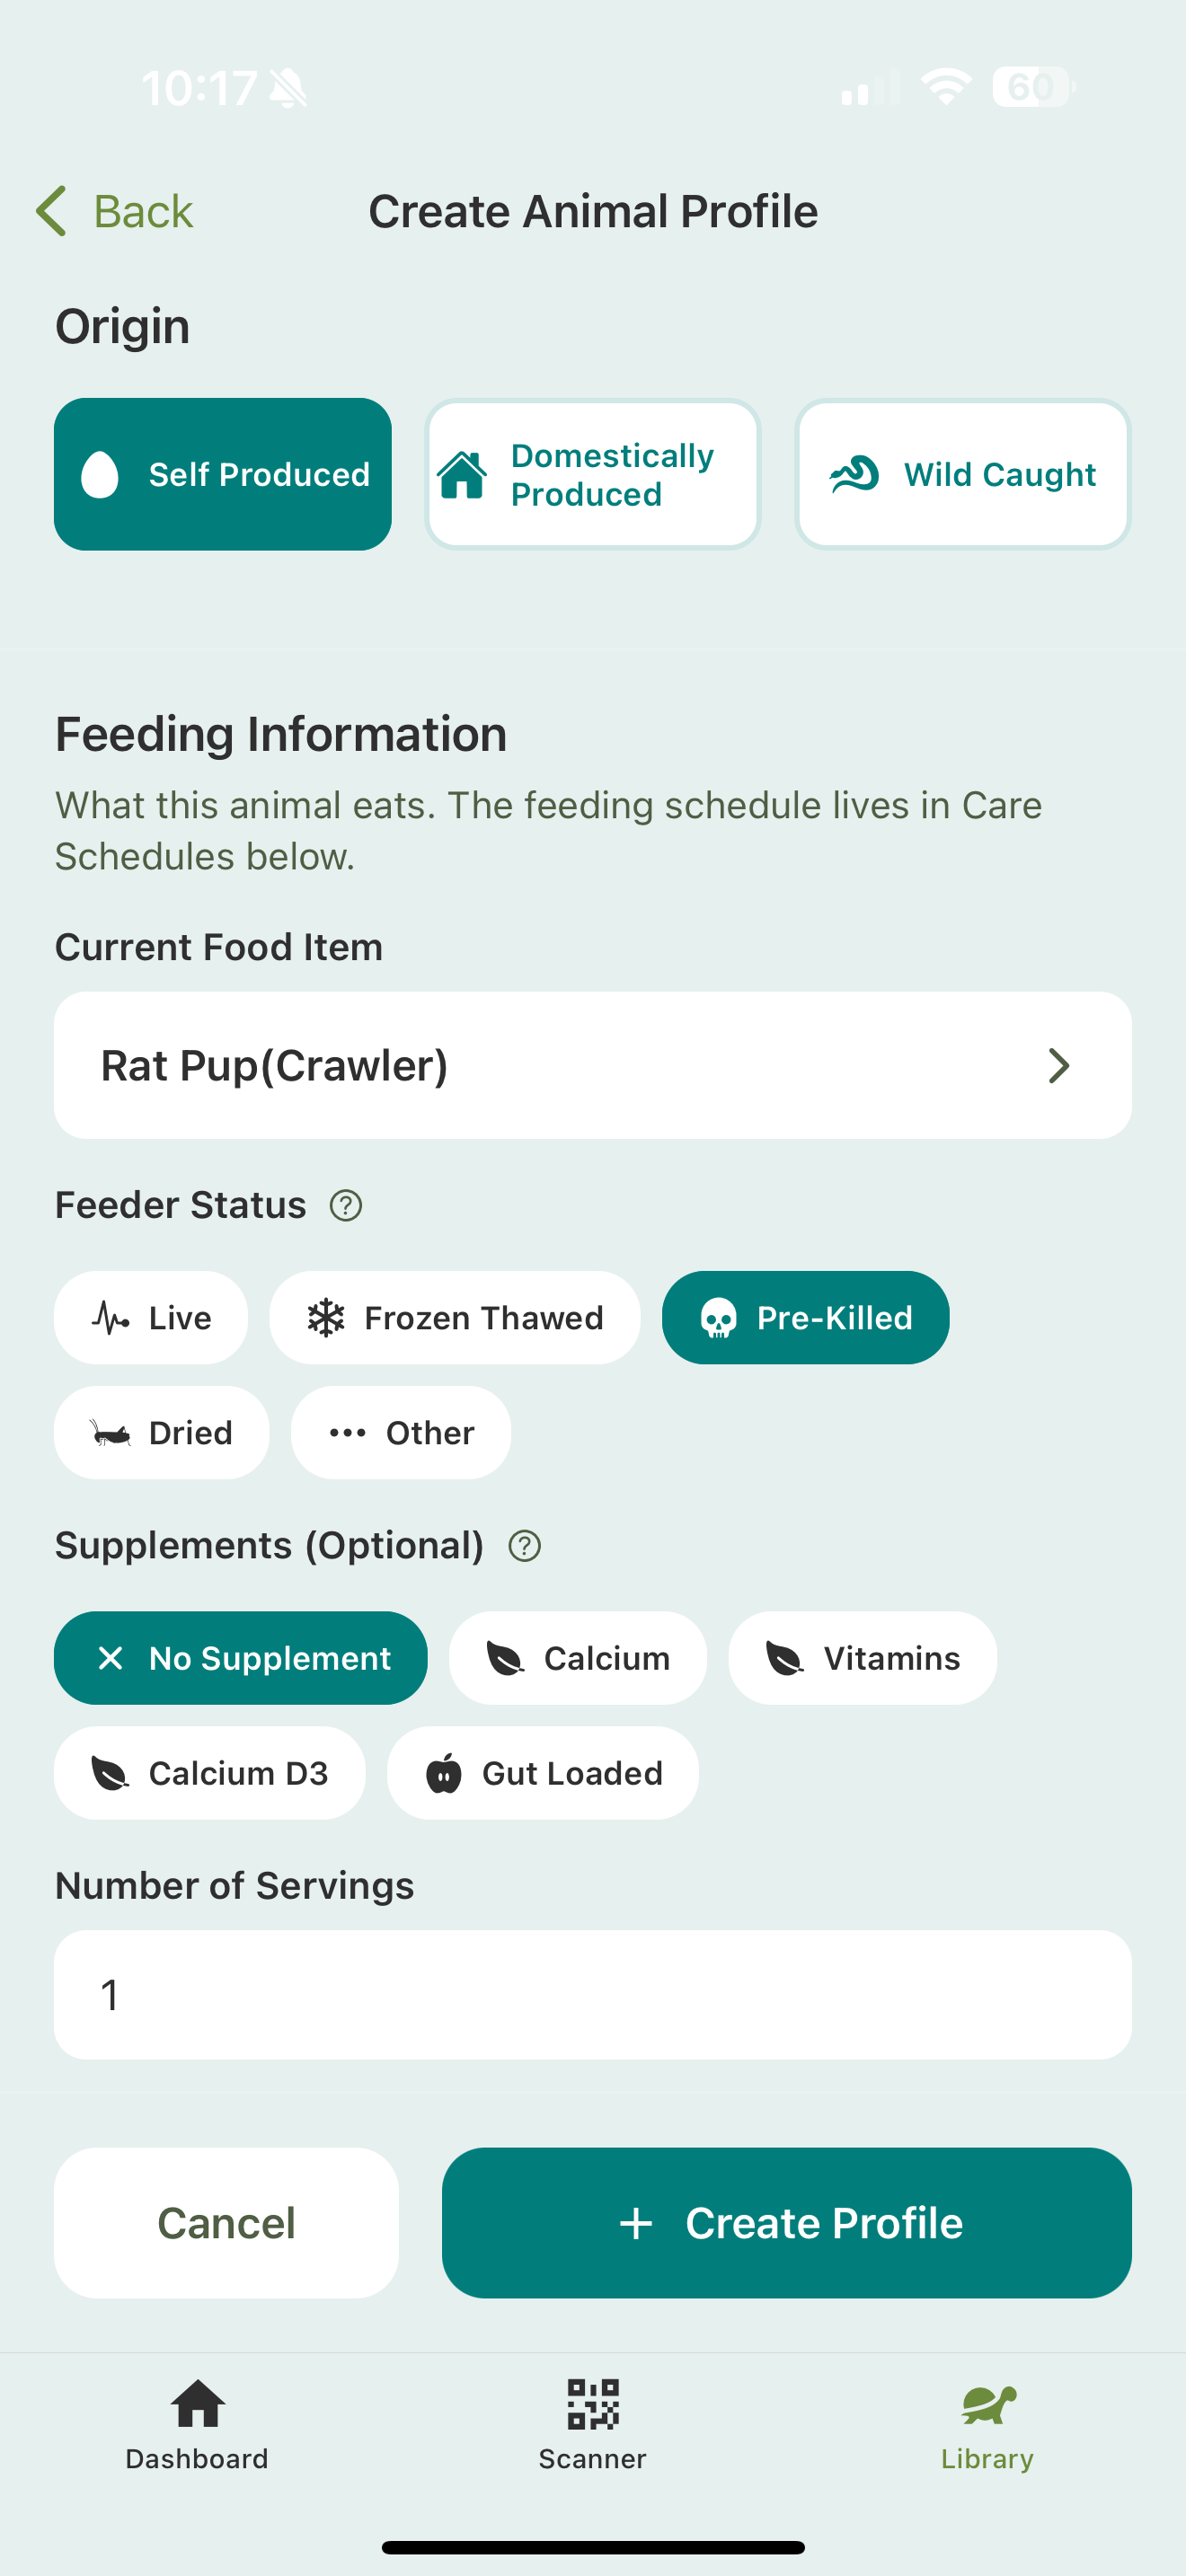
Under Feeding Information, set what this animal eats:
- Current food item — the prey it’s on (e.g. a rat pup), which the feeding log and pick list use.
- Feeder status — live, frozen-thawed, pre-killed, dried, or other.
- Supplements and number of servings — optional.
The feeding schedule itself lives in Care & Scheduling, not here.
A few things worth doing next
- Set collection defaults. If you mostly keep one species, set it as your default so new animals pre-fill. See Collection defaults.
- Add more photos. Open the animal and add a few. They show in a gallery on the profile and public page.
- Print a QR code. Stick it on the enclosure so you can scan straight to this animal later. See QR scanner & multi-scan.
Next
Now log your first event.